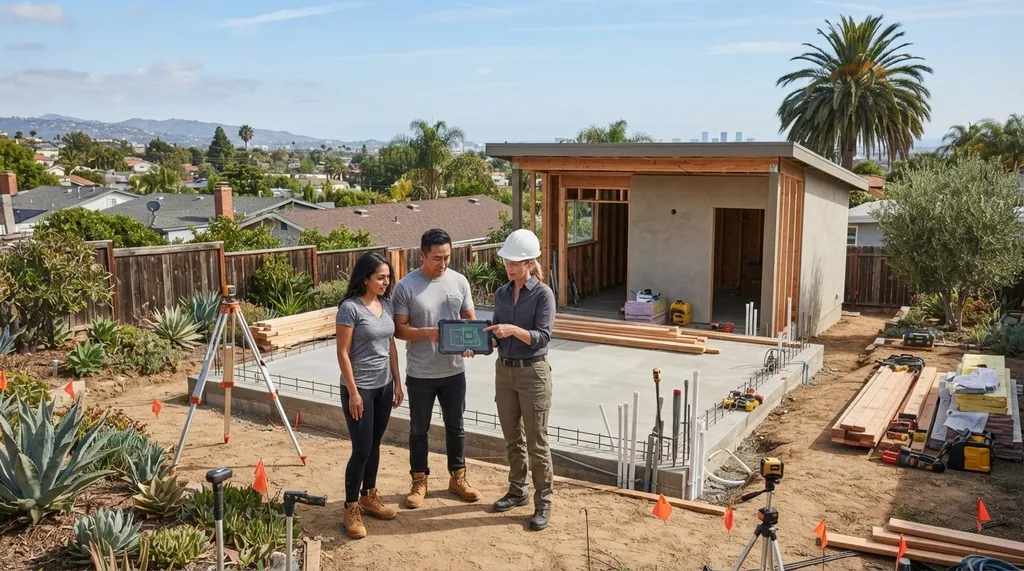


Relying entirely on a general contractor to oversee your build is the quickest way to lose control of your schedule. Successful construction demands owner-driven milestone verification, and using an actionable adu project management checklist for homeowners puts that oversight directly in your hands.
Building an accessory dwelling unit shouldn't feel like a constant guessing game. It's completely natural to worry about unexpected utility trenching, multi-department municipal delays, and validating contractor invoices without clear proof of completion. Without structured oversight, minor site issues quickly snowball into costly disruptions.
You don't have to manage the construction process in the dark. This guide equips you to master your backyard build with a practical, phase-by-phase roadmap covering site feasibility, contractor accountability, California code compliance, and essential field inspections. Ahead, you'll find the exact milestone workflows needed to prevent scope creep, protect your budget, and guide your project confidently from property audit to final occupancy.
Phase 1 Checklist: Site Feasibility and Zoning Assessment
Before commissioning architectural concepts or submitting blueprints, you must verify the physical and legal constraints of your parcel. Grounding your build in verified civil realities prevents expensive design revisions later. An effective adu project management checklist for homeowners begins directly in the yard, validating real boundaries rather than relying on assumed fence lines.
Property Boundaries, Setbacks, and Protected Trees
Never rely on visual property markers or existing fences. Order a formal boundary survey if property pins or corner markers are ambiguous. California state development standards guarantee a maximum four-foot side and rear setback for detached structures, allowing you to optimize building footprints even on compact suburban lots. Verify these boundaries against recorded municipal easements, including utility rights-of-way and overhead power corridors. If your parcel features mature canopy trees, identify native species like coast live oaks. Many local jurisdictions mandate critical root-zone protection plans that dictate your foundation style, prohibiting traditional slab-on-grade excavation within the tree canopy drip line.
Utility Infrastructure and Main Service Capacity Audits
Utility connections represent the single largest blind spot in pre-construction planning. While standard floor plans account for interior living space, they overlook the subgrade infrastructure required to connect a detached Accessory Dwelling Unit (opens in a new tab) to municipal services. Conduct these mechanical checks before drafting blueprints:
- Main Electrical Service Panel: Inspect your existing electrical panel rating. Older 100-amp or 125-amp service panels cannot handle modern dual-fuel heat pumps, induction ranges, and EV charging, necessitating a utility-approved service panel upgrade to 200 amps.
- Sewer Lateral Invert Elevation: Locate your primary sewer cleanout and determine the invert elevation. Your new subgrade drain lines require a minimum downward slope of one-quarter inch per linear foot; if your backyard slopes lower than the street connection, you must budget for a sewage ejector pump.
- Water Meter Sizing: Assess your existing domestic water supply line diameter. Incorporating residential fire sprinklers frequently demands a larger water meter service to maintain compliant hydraulic flow rates.
- Local Code Overlays: Verify regional zoning requirements using the ADU feasibility check (opens in a new tab) to ensure local utility and design overlay standards align with state statutory mandates.
Catching these site-specific conditions early transforms your adu project management checklist for homeowners into a reliable defense against hidden trenching expenses and structural redesigns.
Phase 2 Checklist: Architectural Design and Permit Approvals
Transforming your initial lot assessment into an approved, buildable plan set requires strict coordination. Skipping thorough technical reviews at this stage invites endless correction notices from city plan checkers. Adding design oversight milestones to your adu project management checklist for homeowners keeps your design professionals accountable and ensures your submittal moves smoothly through municipal review channels.
Assembling the Permit-Ready Submittal Package
Select your building methodology before drafting structural details. While traditional stick-built framing offers endless site customization, panelized or modular systems can accelerate onsite assembly. Once decided, require your design team to compile a cohesive blueprint package containing:
- Comprehensive Architectural Sheets: Detailed dimensioned site plans, foundation outlines, exterior elevations, cross-sections, and precise electrical rough-in layouts.
- Stamped Structural Engineering: Calculations sealed by a licensed California structural or civil engineer, specifically calibrated to local seismic design categories and soil bearing capacities.
- Title 24 Energy Documentation: Mandatory California energy calculations detailing window solar heat gain coefficients, envelope insulation values, and required photovoltaic solar arrays.
- Civil Grading and Drainage Plans: Clear run-off routing diagrams ensuring stormwater does not drain onto adjacent properties or pool near structural footings.
Managing Municipal Plan Checks and Department Clearances
Submitting through an online building portal is just the beginning. In California, local agencies must issue a written determination of whether your ADU application is complete within 15 business days. Once marked complete, state statute mandates that jurisdictions approve or deny your permit within 60 days. However, delays frequently occur across internal municipal siloes, including public works, local fire authorities, and regional sanitation districts.
Establish a strict ten-day turnaround protocol with your architect to resolve correction notices as soon as the building department releases plan-check comments. Simultaneously, audit potential development fees. California law exempts units under 750 square feet from general impact fees, while spaces under 500 square feet of interior livable area avoid local school fees entirely. Review local standards through our guides on Los Angeles local rules (opens in a new tab) or San Jose local rules (opens in a new tab) to verify how individual municipalities calculate these exemptions. Once your plans enter review, use our platform to find vetted local builders (opens in a new tab) ready to quote your approved drawings.
Active tracking ensures your adu project management checklist for homeowners drives steady progress rather than letting your application gather dust on a plan-checker's desk.
Phase 3 Checklist: Contractor Bidding, Vetting, and Contracts
Hiring a builder is the most financially significant stage of your project. Vague proposals and casual handshake agreements routinely lead to cost inflation and abandoned jobsites. Integrating strict vetting and contracting standards into your adu project management checklist for homeowners protects your investment before ground breaks.
Standardizing Bid Packages and Scope Documentation
Never request estimates based on conceptual sketches. Distribute an identical bid package to at least three licensed general contractors, containing your approved plan set, structural calculations, and a standardized scope of work spreadsheet. Demand line-item cost breakdowns across critical divisions, such as site excavation, concrete foundation, rough framing, plumbing, electrical, and finish allowances.
Detailed line items prevent lowball bids that intentionally omit essential subgrade work. Verify each builder's standing using the Contractors State License Board database to confirm an active Class B license, verified workers' compensation coverage, and an active surety bond. Review our practical ADU contractor vetting guide (opens in a new tab) to evaluate past project portfolios and conduct thorough references before signing agreements.
Structuring Milestone Contracts and Lien Protections
Never allow your general contractor to dictate a front-loaded payment schedule. California law strictly limits down payments for home improvement projects to 10% of the contract price or $1,000, whichever amount is less. Every subsequent disbursement must tie directly to verified, physical progress backed by passed building inspections rather than arbitrary calendar dates.
- Milestone-Tied Draws: Release funds only after municipal inspectors sign off on specific stages, such as foundation pour, framing completion, rough MEP clearance, and drywall installation.
- Mandatory Lien Waivers: Require a signed, unconditional lien waiver for every prior progress payment alongside conditional waivers for the invoice currently being processed. This applies to both the primary contractor and all material suppliers.
- Retainage Holdback: Withhold a 10% retainage balance from every payment until the building department issues a final Certificate of Occupancy and you confirm all punch-list items.
- Standardized Contract Terms: Draft your agreement using our structured ADU construction contract guide (opens in a new tab), explicitly stating cleanup rules, work hours, and formal change-order approval procedures.
Maintaining financial leverage through inspection-backed draws ensures your adu project management checklist for homeowners prevents unearned progress disbursements and keeps your build moving forward.
Phase 4 Checklist: Jobsite Construction and Inspection Protocols
Active jobsite management separates projects that finish on time from those that derail into endless delays. Once framing begins, passive oversight creates severe communication gaps between trade subcontractors and municipal inspectors. Incorporating rigorous jobsite protocols into your adu project management checklist for homeowners keeps trades synchronized and holds your general contractor accountable to verified building standards.
Managing the Core Municipal Inspection Sequence
Never permit structural elements to be covered before a city inspector signs off on the official job card. Missing an inspection milestone often forces destructive openings in finished assemblies. Require your builder to notify you 24 hours prior to calling for each mandatory site visit:
- Foundation and Setback Verification: Confirm forms, trenches, and steel rebar grids match structural drawings before any continuous concrete placement occurs.
- Rough Trades (MEP) and Framing: Verify mechanical ducting, electrical rough-ins, and drain piping pass before installing insulation. City inspectors will check plumbing hydrostatic pressure tests and gas line pressure gauges during this walkthrough.
- Exterior Sheathing and Lath: Inspect weather-resistive barriers, flashing around window penetrations, and wire lath attachment before exterior stucco or siding application.
- Insulation and Draft Stopping: Document that thermal batts or blown insulation meet Title 24 envelope requirements before drywall crews seal wall cavities.
Change Order Protocols and Schedule Tracking
Uncontrolled scope revisions destroy project budgets faster than any other jobsite factor. Implement a zero-verbal-authorization rule across your entire property. If a field condition demands modifications, require your contractor to submit a written change order documenting the exact scope adjustment, itemized material and labor costs, and the specific impact on the master completion date.
Establish a weekly on-site coordination walkthrough with your project superintendent to review the trailing five days of work and preview upcoming trade arrivals. Walk through the framed structure right after rough MEP sign-off and take dated, high-resolution photographs of every open wall bay. Documenting exact plumbing runs, junction boxes, and structural hold-downs provides a permanent record that simplifies future maintenance. If you haven't secured a builder with a demonstrated record of transparent jobsite communication, connect with pre-screened general contractors (opens in a new tab) who adhere to strict milestone documentation standards.
Maintaining clear oversight during physical construction ensures your adu project management checklist for homeowners protects both your home and your financial investment.
Phase 5 Checklist: Final Punch List, Occupancy, and Closeout
Reaching the final phase of construction is exciting, but handing over the final payment prematurely eliminates your leverage. A successful completion requires a meticulous review of cosmetic finishes, full mechanical commissioning, and formal regulatory closeout. Concluding your build with an exhaustive adu project management checklist for homeowners guarantees that your accessory unit is safe, fully functional, and legally permitted before tenants or family members move in.
Conducting the Detailed Punch List Walkthrough
Schedule a dedicated, daylight walkthrough with your general contractor once all major trades have cleared the site. Carry blue painter's tape, a digital notepad, and an electrical receptacle tester. Methodically verify interior finishes and mechanical components room by room:
- Electrical Fixtures and Circuits: Test every wall outlet, trip and reset GFCI receptacles in kitchens and bathrooms, test smoke and carbon monoxide detectors, and confirm dimmer switches operate smoothly.
- Plumbing Commissioning: Fill every sink basin and shower pan to check drain speeds, verify hot water delivery from the water heater, and inspect under-sink supply lines for active seepage.
- HVAC Performance: Cycle your mini-split heat pump through heating and cooling modes, checking thermostat responsiveness, airflow direction, and condensate line drainage outside.
- Building Envelope and Finishes: Inspect drywall seams under natural light, check for complete paint coverage, ensure interior doors latch without binding, and verify window weatherstripping seals tightly.
Never release the final 10% retainage balance until your builder resolves every single item on this punch list.
Permit Sign-Off, Certificate of Occupancy, and Handover
Final payment should only occur after the municipal building inspector signs the physical job card. Local agencies then transmit approvals to the planning division to generate your formal Certificate of Occupancy. At handoff, collect all equipment warranty certificates, Title 24 compliance forms, and operating manuals for mini-splits, water heaters, and installed appliances.
Collect executed final unconditional lien waivers from your general contractor, major subcontractors, and primary building material supply yards. These documents protect your primary residence against unexpected mechanics' liens. If you are building in Northern California, review specific closeout procedures across regional hubs like our guide to Sacramento county regulations (opens in a new tab). You can also organize your upcoming build from initial lot audit through final inspection sign-off using our structured pre-construction framework (opens in a new tab).
Closing out your build with an adu project management checklist for homeowners ensures your new living space is legally compliant, fully protected under warranty, and ready for immediate occupancy.
Take Control of Your Build From Groundbreak to Move-In
Managing an accessory dwelling unit build doesn't require decades of construction experience, but it does demand disciplined oversight. True control comes down to verifying subgrade utility capacity early, tying disbursements strictly to passed municipal inspections, and tracking every change order in writing. Using a structured adu project management checklist for homeowners protects your financial investment and ensures no technical detail slips through the cracks.
You don't have to navigate this process alone. When you're ready to assemble your team, find vetted ADU contractors for your project (opens in a new tab) through ADUDesk's verified California network. Backed by our city-specific regulatory databases and pre-construction planning tools, you can manage each milestone with total clarity. Your backyard build is entirely within reach, and with the right framework in hand, you can lead your project across the finish line with confidence.
Frequently Asked Questions
Can a homeowner manage their own ADU construction project in California?
Yes, California permits property owners to pull construction permits as an Owner-Builder. However, doing so makes you personally liable for jobsite safety, code compliance, and managing individual trade subcontractors. Many property owners in cities like Los Angeles, San Diego, and San Jose choose to pair an adu project management checklist for homeowners with a vetted general contractor instead, avoiding full legal liability while maintaining tight project control.
What is the standard inspection sequence for building an ADU?
Municipal building departments enforce a sequential inspection schedule that begins well before framing. The core sequence starts with foundation excavation, setback validation, and subgrade plumbing lines. It then advances to rough framing, electrical, plumbing, and mechanical rough-ins, followed by weatherproofing lath and thermal insulation. The final step involves comprehensive building, electrical, and life-safety inspections to secure your official Certificate of Occupancy.
How should an owner structure progress payments to protect their budget?
Progress disbursements should always link directly to passed municipal inspections rather than arbitrary calendar dates. California statutes limit initial down payments to 10% of the project contract or $1,000, whichever amount is smaller. Structure all subsequent milestones around verified achievements like foundation placement, structural framing sign-off, and rough trade clearance, while withholding a 10% retainage until every final punch-list item is resolved.
What happens if an ADU fails a rough framing or plumbing inspection?
When an assembly fails inspection, the city building inspector leaves a formal correction notice detailing the code violations. Construction cannot proceed to insulation or drywall until trades correct every listed defect. Your general contractor must remediate the non-compliant work, verify corrections against the approved structural plans, and request a re-inspection. Keep these correction notices organized to determine whether re-work causes unapproved schedule delays.
Do I need a separate utility meter for a detached backyard ADU?
California state law doesn't require separate utility meters for detached accessory dwellings, allowing homeowners to run branch connections from existing residential meters. However, if you plan to lease the accessory unit to long-term tenants in Oakland or Sacramento, separate electrical and water sub-meters simplify utility accounting. You should assess your main electrical panel capacity during feasibility to verify whether running branch lines triggers a utility service upgrade.
How do change orders impact the overall construction timeline and costs?
Unplanned change orders represent the primary driver of schedule delays and budget creep during backyard construction. Altering structural framing layouts, moving plumbing drains, or changing electrical boxes mid-stream disrupts trade coordination and can trigger municipal plan-check revisions. Using an adu project management checklist for homeowners establishes a strict protocol where contractors must provide written cost adjustments and schedule revisions before completing any modified field work.
What documentation is required before releasing the final payment to a contractor?
Never release the final retainage disbursement without collecting complete legal, municipal, and mechanical documentation. You need the building inspector's signed final inspection card, the Certificate of Occupancy, and signed final unconditional lien waivers from both your builder and material suppliers. You should also obtain manufacturer equipment warranties, Title 24 certificates, and operational manuals for mini-split heat pumps and water heaters.