
The success of your ADU project is 60% planning and only 40% building. While it's tempting to focus on floor plans and modern finishes, the timeline is actually won or lost in the pre-construction phase. You likely feel the weight of 2026 zoning updates and the fear of getting stuck in city hall red tape for months. It's frustrating to start a journey without knowing exactly where the finish line is or when you'll need to hire a contractor. Before you commit to a design, starting with a comprehensive adu site assessment checklist is the only way to identify hidden utility hurdles or setback issues that could stall your progress.
This guide helps you master the 12 to 18 month journey of building an ADU by providing a realistic, phase by phase breakdown. You'll learn how to navigate the design process, survive the permitting office, and manage construction with confidence. We'll walk through a month by month roadmap that helps you time your financing and avoid common delays. From the first rule check to the final walkthrough, you'll gain the clarity needed to turn your backyard into a functional living space without the typical stress.
Phase 1: Feasibility and the ADU Site Assessment Checklist (Months 1-3)
Projects don't usually fail during construction; they fail during the feasibility phase. Many homeowners rush into hiring an architect before they understand what their land actually allows. This is a mistake that leads to expensive redesigns and lost time. The first three months of your journey are about ground-truthing your property. You need to identify where your sewer lines run, where your property lines sit, and what the local soil conditions are. Using a local rule checker ensures you're building based on 2026 standards, not outdated regulations from previous years.
The "Month 0" ADU Site Assessment Checklist
Don't sign a single design contract until you've performed a thorough property review using an adu site assessment checklist. This preliminary step identifies physical constraints that a standard map won't show. A professional checklist acts as your insurance policy against project stalls. You should look for "Red Flags" that can stop a project in its tracks. These include utility easements where a power line or sewer main crosses your yard, or the presence of protected trees like heritage oaks that require special permits to build near.
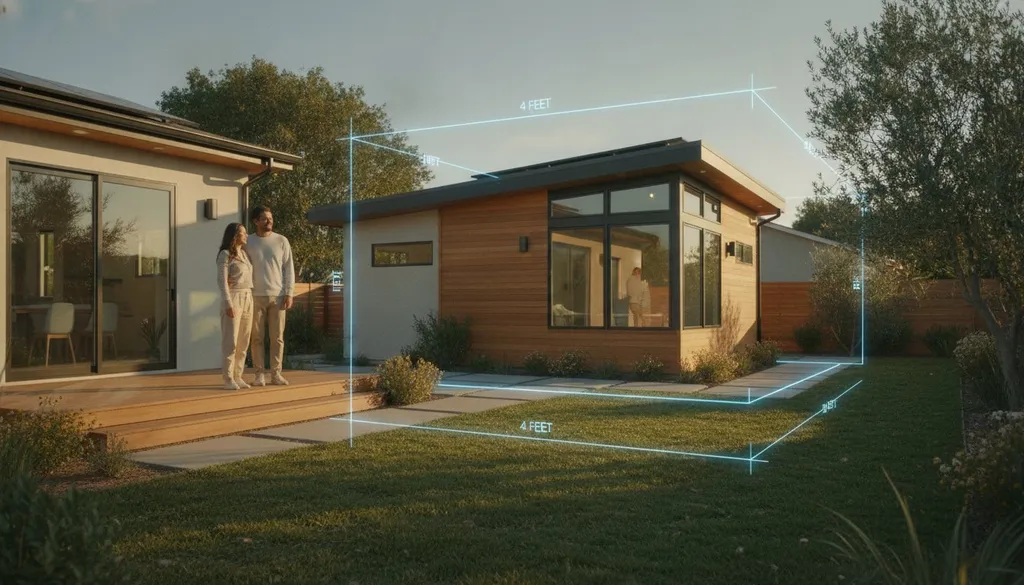
Verify your specific 2026 California setback requirements early. While state law generally mandates a 4 foot side and rear setback for most ADUs, local nuances still exist. You must also confirm your utility hookup strategy. Will you tap into the existing main house line or do you need a new, separate meter? This decision alone can change your budget by thousands of dollars. Identifying these variables now prevents the zoning surprises that often kill project momentum later.
Choosing Your Design Strategy
Your choice between a custom build and a pre-approved plan dictates your total timeline. For example, San Diego ADU requirements (opens in a new tab) offer streamlined pathways for permit-ready designs. These pre-approved plans can save you 2 to 4 months in the drafting and review phase because the city has already vetted the structural engineering. It's a fast-track option for homeowners who prioritize speed over total customization.
Custom designs offer flexibility but require more intense engineering. If you go this route, expect to spend more time on structural calculations and soil reports. Regardless of the path you choose, you must set a "Design Freeze" date by the end of Month 3. This means no more changes to the floor plan or window placements. Scope creep after this point is the primary cause of budget overruns and permitting delays. Once your design is frozen, use a data-driven ADU cost calculator to finalize your preliminary budget based on 2026 market rates for labor and materials.
Phase 2: Permitting and City Approvals (Months 3-8)
Once your design is frozen and your adu site assessment checklist has cleared you of major property hurdles, you enter the permitting phase. This is often the most stressful period because the timeline is no longer in your hands. You start by submitting a "Permit Intake" package to your local planning department. This set includes your architectural drawings, structural engineering, and Title 24 energy calculations. Under current 2026 statewide ADU regulations (opens in a new tab), cities must notify you within 15 business days if your application is complete. If it's deemed complete, the city has a 60 day window to approve or deny your permit.
Don't expect immediate approval. Most projects go through at least one "Request for Information" (RFI) cycle. This is a standard back and forth where city engineers ask for clarification on specific details like drainage or electrical loads. Your architect or engineer must respond quickly to these requests to keep the clock moving. Once all technical questions are resolved, you'll pay your impact fees to reach "Ready to Issue" (RTI) status. For ADUs under 800 square feet, 2026 laws offer significant fee exemptions that can save you thousands in pre-construction costs.
Garage Conversion vs. Detached ADU Timelines
The type of unit you build significantly impacts how long you'll spend in the permitting queue. For instance, garage conversions in Los Angeles (opens in a new tab) often move through the system up to 30% faster than new detached structures. This is because the city is reviewing a non-structural conversion of an existing envelope rather than a new foundation and framing system. If you're building in Northern California, the San Francisco ADU guide (opens in a new tab) highlights that while timelines are improving, the multi-departmental review process still requires a methodical approach compared to the more streamlined Southern California systems.
Managing the "Waiting Room" Phase
Waiting for a city stamp doesn't mean your project has to stop. You can track your progress in real time through city portals like San Diego's DSD. Use this "waiting room" period to prepare your property physically. You can clear debris, remove old sheds, or relocate existing landscaping to ensure the site is ready for excavation the moment the permit is issued. This is also the ideal time to start matching with vetted contractors (opens in a new tab) so you have a signed contract and a start date ready for the day your permit arrives. By being proactive, you ensure that the adu site assessment checklist you completed in Phase 1 translates into a smooth transition to breaking ground.
Phase 3: The Bridge-Contractor Matching and Vetting
While your permit application sits in the city review queue, you enter a period known as "The Bridge." This is the critical three month window where you transform your approved plans into a binding construction contract. You shouldn't wait for the physical permit to be in your hand before you start searching for reliable ADU contractors (opens in a new tab). Instead, use the 60 day state mandated review period to vet builders and compare bids. During these initial walk-throughs, referencing the results of your adu site assessment checklist is vital. Sharing the specific data you gathered about utility locations and setbacks helps contractors provide more accurate, fixed price bids rather than vague estimates.
Aim to collect and compare at least three competitive bids. In the 2026 market, labor and material costs can fluctuate significantly between regions. Ensure each bid itemizes labor, materials, and specialized engineering needs. Before moving forward, verify that every candidate holds an active California state license in good standing with the CSLB. Confirm they carry both workers' compensation and general liability insurance. Once you've selected a partner, negotiate a contract that includes clear payment milestones tied to physical progress, such as foundation completion or "drying in," rather than calendar dates.
Why Timing Your Hire Matters
There's a significant danger in signing a builder before your plans are finalized by the city. If the planning department requires a redesign during the "Request for Information" cycle, a pre-signed contract could lead to expensive change orders before you even break ground. It's better to find contractors (opens in a new tab) in high demand areas like Sacramento or Oakland early but wait to sign the final construction agreement until the city gives the green light. Using a structured 2026 construction contract guide (opens in a new tab) helps you protect your timeline by including clauses for site cleanup and project duration guarantees.
The Interview and Vetting Process
When you sit down with potential builders, use a specific list of questions to ask an ADU contractor (opens in a new tab) regarding their 2026 availability. Many reputable firms are booked months in advance, so you need to know exactly when your project fits into their pipeline. Ask about their experience with specific city inspectors in your neighborhood. A contractor who knows what a San Jose or San Diego inspector looks for can often pass inspections on the first try, saving you weeks of delay. Finally, request a "Critical Path" schedule. This document identifies potential supply chain bottlenecks for long lead items like windows or electrical panels, allowing you to order materials before the first shovel hits the dirt.
Phase 4: Construction and Inspections (Months 9-14)
The first shovel in the ground marks the start of a 6 to 12 month construction window. This is the stage where your planning becomes a physical reality. Success during excavation and foundation pouring relies heavily on the accuracy of your initial adu site assessment checklist. If you correctly identified utility lines and soil conditions in Phase 1, your team can break ground without the fear of hitting a surprise sewer main or an undocumented gas line. Once the foundation is poured and cured, the project moves into the vertical phase.
Framing and roofing are high-momentum milestones. During these weeks, your unit will quickly take shape. The primary goal here is to get the structure "dried in," meaning the roof and windows are installed to protect the interior from the elements. This allows interior work to proceed regardless of weather conditions. Throughout this phase, your contractor must coordinate closely with city inspectors for structural sign-offs before any interior walls are closed.
The "Rough-In" Bottleneck
Installation of plumbing, electrical, and HVAC systems represents the most common project delay point. These "rough-in" stages require specialized trades to work in a tight sequence. Delays often occur when waiting for local utilities like LADWP or PG&E to approve meter splits or new connections. In 2026, utility coordination remains a high-touch process that requires constant follow-up. You should also maintain active communication with your neighbors during these loudest phases. Keeping them informed about scheduled noise or temporary street blockages prevents friction and potential complaints to the city. To ensure your build stays on track, it's vital to hire a contractor with a proven local track record (opens in a new tab) for managing these specific trade hand-offs.
Finishes and Quality Control
The final months focus on cabinetry, flooring, and appliance installation. While these tasks feel less structural, they require a high level of precision. As the project nears completion, you'll walk the site with your builder to create a "Punch List." This is your formal document for identifying and fixing minor defects, such as paint touch-ups or cabinet alignments, before you issue the final payment. The project concludes only when the city performs the final building inspection and issues a Certificate of Occupancy. This document legally confirms the unit is safe for habitation and marks the official end of the construction timeline.
Phase 5: Post-Construction and Occupancy (Months 15+)
The journey that began with your initial adu site assessment checklist finally concludes when the city issues the Certificate of Occupancy. This document is the legal finish line, confirming that the structure is safe, compliant, and ready for use. Once you receive the final sign-off, ensure your contractor provides a complete close-out package. This should include all permit copies, final inspection cards, and a list of subcontractors who worked on the project. You'll also need to update your homeowners insurance immediately. Most standard policies require a rider for "other structures" to ensure your new asset is fully protected against fire or liability claims.
Understanding the 2026 property tax implications is vital for your long-term budget. In California, building an ADU triggers a "blended assessment." Your primary home retains its existing tax base under Proposition 13, while the ADU is assessed separately based on the market value it adds to the property. This prevents a full reassessment of your entire estate, keeping your tax increase predictable. You should verify that the county assessor has recorded the completion correctly to avoid administrative headaches during future property appraisals or sales.
Final Administrative Tasks
Transitioning from a construction site to a functional living space requires a final hand-off of technical data. Collect all warranties and manual sets for appliances, HVAC systems, and water heaters installed in the unit. It's helpful to utilize an ADU project planning tool (opens in a new tab) to organize these documents and set a recurring maintenance schedule. Regular tasks, such as checking smoke detector batteries and cleaning mini-split filters, preserve the value of your investment. Recording the project's completion with your county assessor ensures your property records are accurate for future refinancing or insurance claims.
Maximizing Your ROI
If your goal is rental income, "Landlord Mode" begins the moment the paint is dry. In competitive markets like San Jose (opens in a new tab), finding a qualified tenant typically takes 30 to 45 days. Set your rental rates by analyzing 2026 local market data for units of a similar size and finish level. High-quality photography and a clear description of the unit's private entrance and utility setup will help you stand out. Once the unit is occupied and generating cash flow, you may want to explore refinancing options. The added square footage and rental income often increase your property's appraised value, allowing you to access equity or secure better loan terms. This final step ensures the adu site assessment checklist you used months ago delivers the maximum financial return.
Taking Control of Your 2026 ADU Timeline
Building an ADU is a marathon, not a sprint. By following a structured 12 to 18 month roadmap, you replace uncertainty with a series of manageable milestones. Remember that your project's foundation is laid long before the first shovel hits the dirt. Starting with a professional adu site assessment checklist ensures you identify zoning constraints and utility hurdles early, preventing the costly mid-project stalls that derail so many homeowners. This proactive approach keeps your budget intact and your move-in date on schedule.
You now have the roadmap to navigate everything from the 60 day permit review window to the final occupancy sign off. While the process is complex, you don't have to manage it alone. Access city-specific data for Los Angeles, San Diego, and the Bay Area to stay ahead of local nuances and 2026 regulatory shifts. When you're ready to transition from planning to building, find vetted ADU contractors for your project (opens in a new tab) through our specialized California network. We connect you with professionals who understand the current landscape and are ready to bring your vision to life. You've done the research; now it's time to build with confidence.
Frequently Asked Questions
How long does the average ADU project take in California in 2026?
An average ADU project in California takes between 12 and 18 months from the initial site walk to the final sign off. This timeline includes approximately three months for feasibility and design, followed by five months for permitting and city approvals. The actual construction phase typically lasts 6 to 12 months, depending on the complexity of the build and local inspection availability. Using an adu site assessment checklist early in the process helps prevent unexpected delays that can extend this window.
Can I speed up the ADU permitting process in Los Angeles?
You can accelerate the permitting process in Los Angeles by utilizing pre-approved "Standard Plans" from the LADBS. These designs have already cleared structural review, which can shave weeks off your timeline. Additionally, ensure your architect submits a complete "Permit Intake" package. Under 2026 state laws, the city must notify you of any missing documents within 15 business days, so responding to these notices immediately is the best way to maintain momentum through the planning department.
What is the fastest type of ADU to build?
Prefabricated or modular units are generally the fastest ADUs to build, often completing on-site work in just 3 to 6 months. Because the structure is built in a factory while your foundation is being poured, you save significant time on framing and roofing. Garage conversions are also a fast track option in cities like Oakland or San Francisco. They utilize an existing building envelope, which reduces the time spent on excavation and structural inspections compared to new detached units.
When should I start looking for an ADU contractor?
Start your search for a contractor during the permitting phase, ideally around Month 4 of your project. This "Bridge" period allows you to vet builders and compare competitive bids while the city reviews your plans. By the time your permit is "Ready to Issue," you should have a signed contract and a builder ready to break ground. This proactive approach prevents the common mistake of waiting for a permit before beginning the weeks long matching and vetting process.
How much time should I budget for city plan corrections?
Budget approximately 4 to 8 weeks for city plan corrections and the "Request for Information" (RFI) cycle. Most projects in 2026 go through at least one round of revisions where city engineers ask for technical clarifications regarding drainage or electrical loads. The speed of this phase depends on how quickly your design team responds to the city's notes. Providing a thorough adu site assessment checklist to your engineer at the start ensures they have the data needed to minimize these back and forth requests.
Does a pre-approved ADU plan actually save time?
Yes, a pre-approved ADU plan typically saves 2 to 4 months in the pre-construction phase. Cities like San Diego and Los Angeles offer catalogs of permit-ready designs that have already been vetted for structural integrity and energy compliance. While you lose some customization, you gain a faster path through the planning department. This is an excellent strategy for homeowners who want to start generating rental income or housing family members as quickly as possible without the stress of custom engineering.
What happens if my ADU construction is delayed by weather?
Weather delays primarily impact the excavation, foundation, and framing stages. If heavy rain occurs before the unit is "dried in," your contractor may need to pause work to protect the site and materials. Most professional construction contracts include a "force majeure" clause or a weather contingency that accounts for these shifts. Maintaining a clear "Critical Path" schedule helps you understand how a one week rain delay affects your final completion date and subsequent interior trade schedules like plumbing and electrical rough-ins.
How long after construction can I move a tenant in?
You can legally move a tenant into your unit the day after you receive the final Certificate of Occupancy from the city. In competitive California markets like San Jose or Sacramento, it typically takes 30 to 45 days to find and vet a qualified tenant. Start your marketing efforts once the unit is in the "Finishes" phase to minimize vacancy time. Ensure your homeowners insurance is updated before the first tenant moves in to cover your new investment and liability requirements.